


After it's cut (still try to keep the pieces together), start rolling from the outside, toward the middle, like this. Roll as tight as you can for about the first 5 or 6 rolls. Make certain that the bottom is smaller than the top, like this picture. The bottom (the smaller part) will be the bottom of your flower, and the top (the larger part), the top of the flower. Make sense? This might take you several times of practice but after a few times, you will be able to roll them in your sleep!
After that, just keep rolling, almost until the end. It should look something like this by the time you are almost done. If the edges start to flare out, its fine! It's just making the "petals" more lose, which makes a bigger rose.

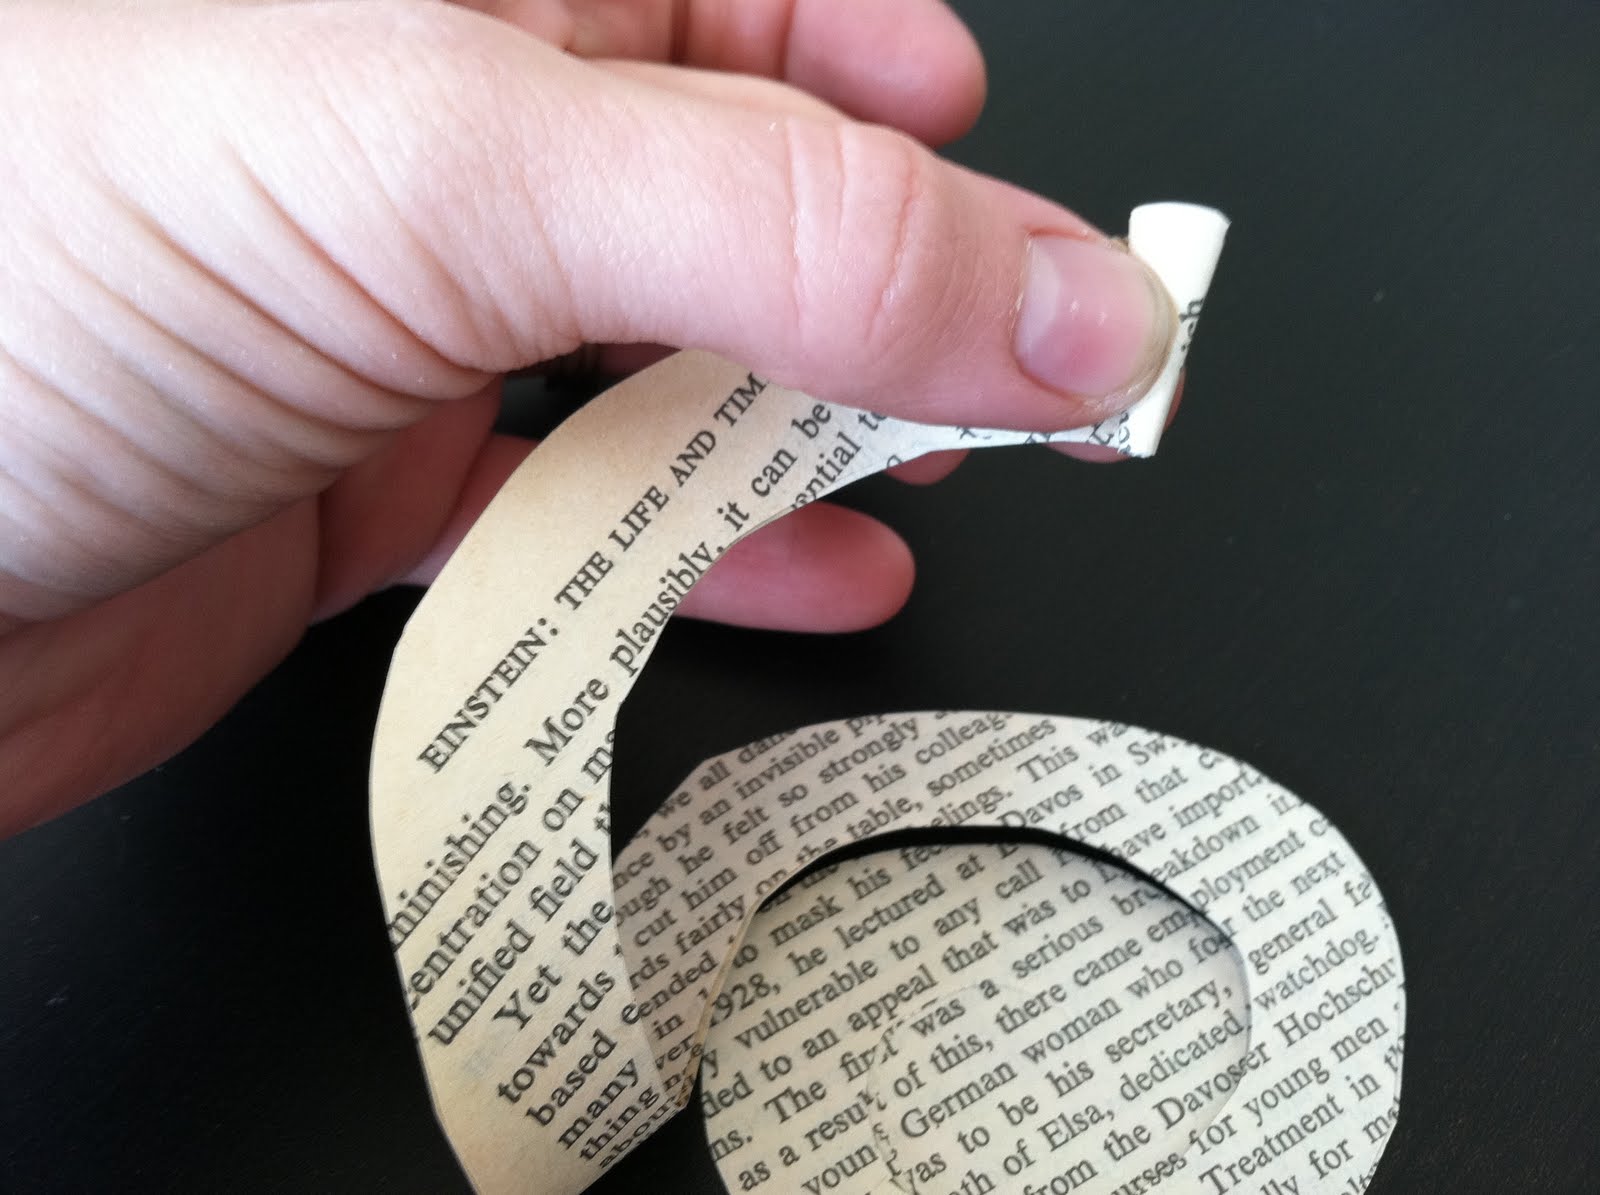
When you get to about this point, it will begin to be difficult to roll. Just cut off the rest, like so...

This is what is should look like!

Now you are almost done! Just let go, and here is your paper rose! If its still a little too tight for your likin, you can just loosen it up with your fingers, or cup it in your hands and shake a little bit.

Now, after several minutes (or hours, or days!) you will have LOTS of delicate paper roses!

Now all you need is a frame. Find your favorite one, and don't worry about the color. You can just spray paint it like i did! This one cost me about 2 bucks at the DI (Utahs version of Goodwill) We struck gold the other day when we found about 10 cans of spray paint in our garage from the previous owners of our home, so i threw on a coat of red and viola! Here is the before picture...

After it dried, i needed a backing to put my roses on. My frame came without anything so I had to think quick. That's where the tide came in! I had very little powder left in the box, so i set it aside, and cut the size I needed for the inside of the frame. Not only did I make the perfect fit, it smelled wonderful! If your frame has glass or cardboard in it, then you're all set. If not, just look around your home and find something that you can cut to size. I hot glued the cardboard in, then one by one, glued in my roses! It was a lot of fun and VERY CHEAP!
The breakdown...
The book: 25 cents
The frame: 2 dollars
The spray paint: FREE!
The cardboard: FREE!
Gluesticks: 2 dollars.
TOTAL! ... $4.25!
~~~~~~~~~~~~~~~~~~~~~~~~~~~
Something like this at Pier 1 or the mall would cost you WAY more than that, AND this way you can personalize it to your liking!
Who said you cant decorate for cheap?!
I was inspired by my friend Laura at work, who found a wreath made of the same roses when we were craft blog stalking last month! She has WAY more patience than I do, and made the wreath. Cute huh?! She's got more cute plans to hang this bad boy! The possibilities for the roses are endless!

***************

That's so cute Jaymes!
ReplyDelete